Work with assertions
An assertion is a validation step that determines whether the automated test scenario is passed or failed, or, in other words, to check if the actual and expected result are equal to each other.
Element Recorder supports different common methods for assertions, including:
Element assertion: asserts if an element's attribute or property (e.g., innerText) matches the expected value.
Page URL assertion: asserts if a page URL's property (e.g., pathname) matches the expected value.
Cookie assertion: asserts if a cookie value of the page matches the expected value
Add an assertion#
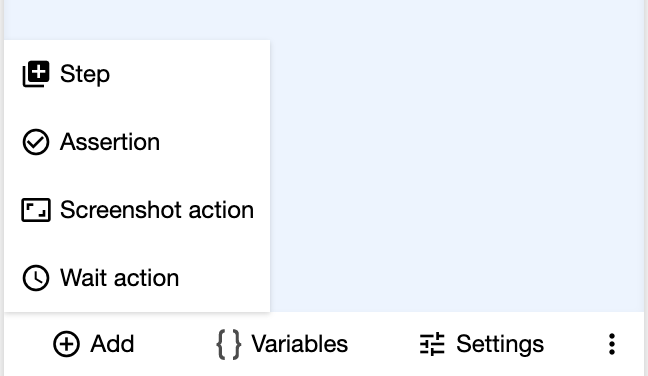
To add an assertion, on Recording screen, click Add > Assertion.
The "Add Assertion" screen will appear with three assertion options.
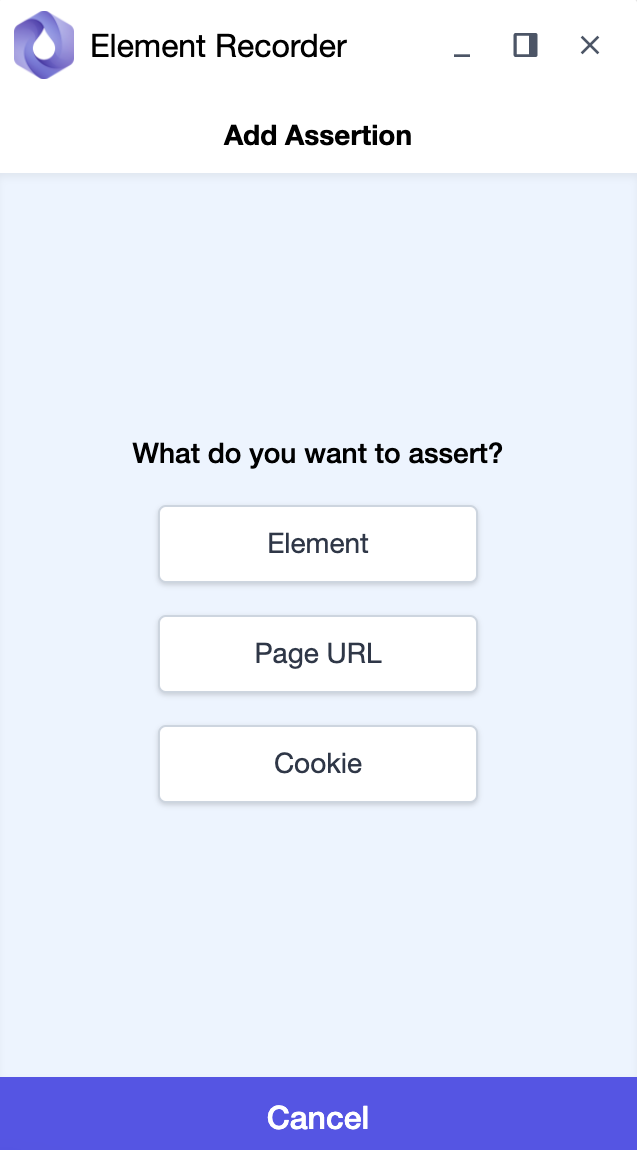
Then select Element, Page URL, or Cookie to add a corresponding assertion. See details in the sections below.
Element assertion#
After selecting to assert Element, you will be prompted to select an element on the page. When you hover on the page, there will be a purple box indicating the element you're about to choose. Click on the element to select.
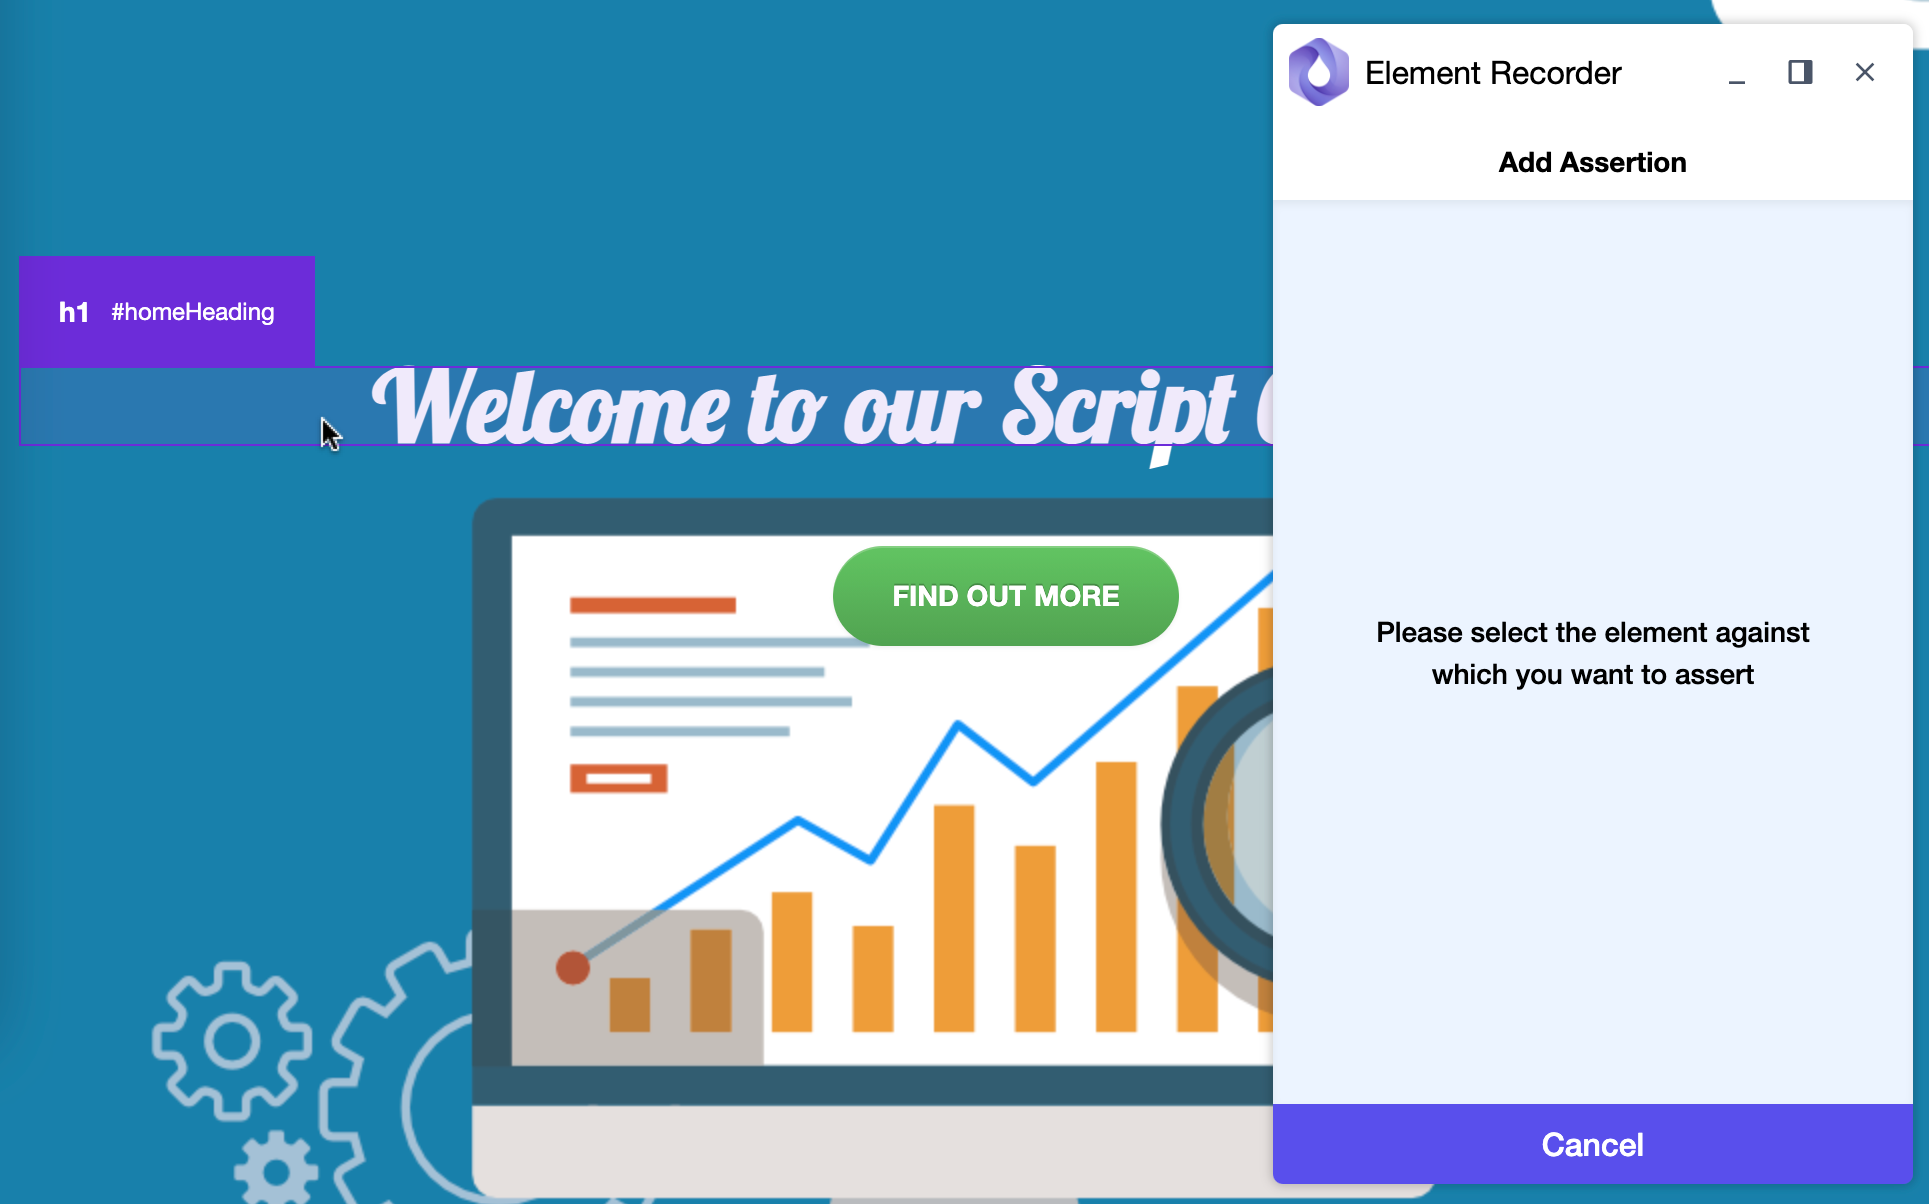
"Element assertion" screen will appear, and you can edit the assertion details.
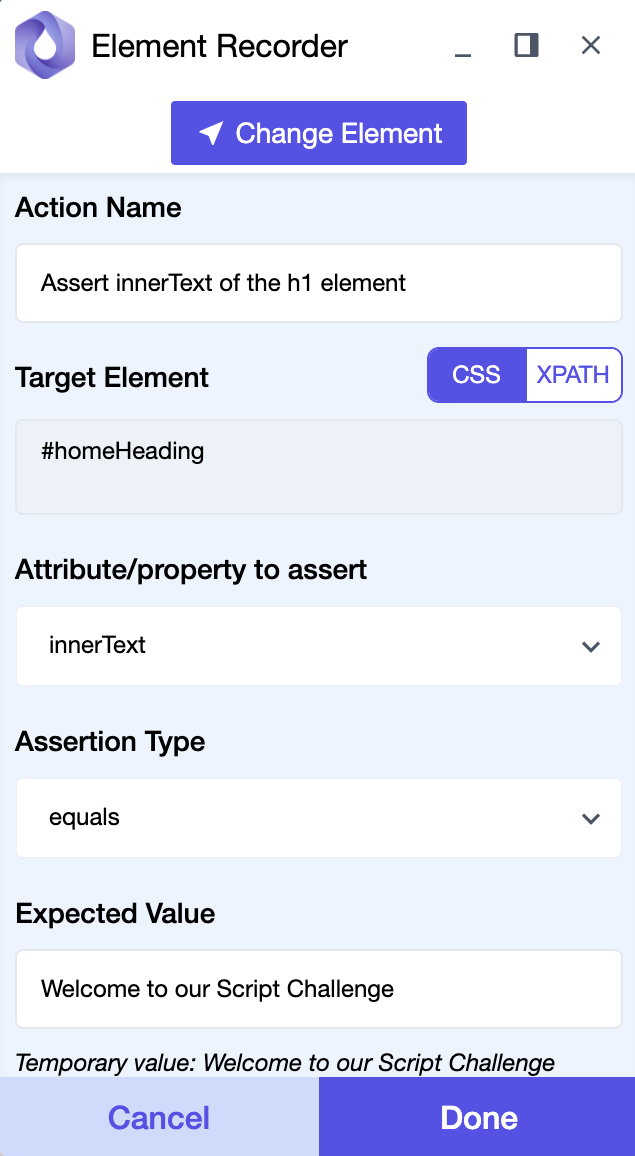
Action name
- Auto-generated based on the Target element and Attribute/property to assert and will be automatically re-generated if these fields get updated.
- You can manually update the action name, but it won't be automatically re-generated in the future.
Target element
Supports switching between
CSSandXPATHselector. By default, elements are selected using theCSSselector. You can change this in the Recorder settings.If you'd like to change the element to assert, click the
Change elementbutton on the top.
Attribute/property to assert
Allows you to select an attribute or property of the target element to assert.
innerTextis selected by default.Assertion type
Allows you to select how the attribute or property above will be asserted against the expected value. A set of string and number comparison operators help you form any assertion conditions. You can even use a regular expression (
matches regex) for intricate assertions.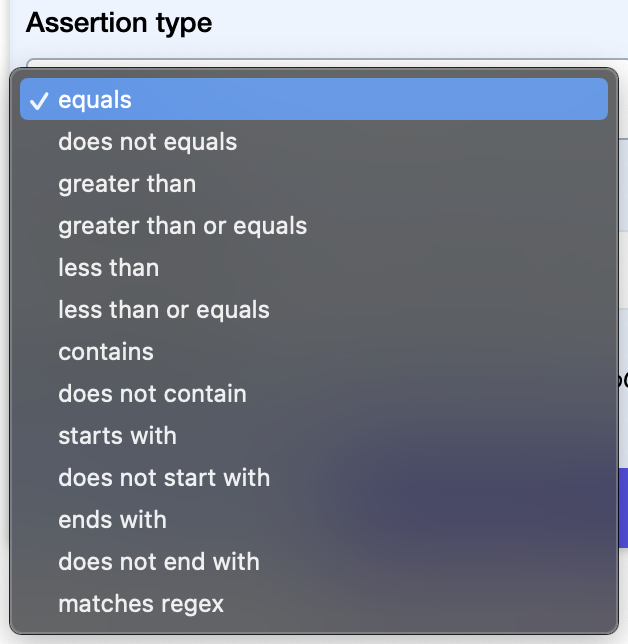
Expected value
Pre-populated with the current value of the selected attribute/property of the target element. It will be automatically re-generated if you change Target element or Attribute/property to assert.
You can change the expected value to suit your test.
You can use variables to make up a value.
Page URL assertion#
After selecting to assert Page URL, you will see "PageURL assertion" screen where you can edit the assertion details.
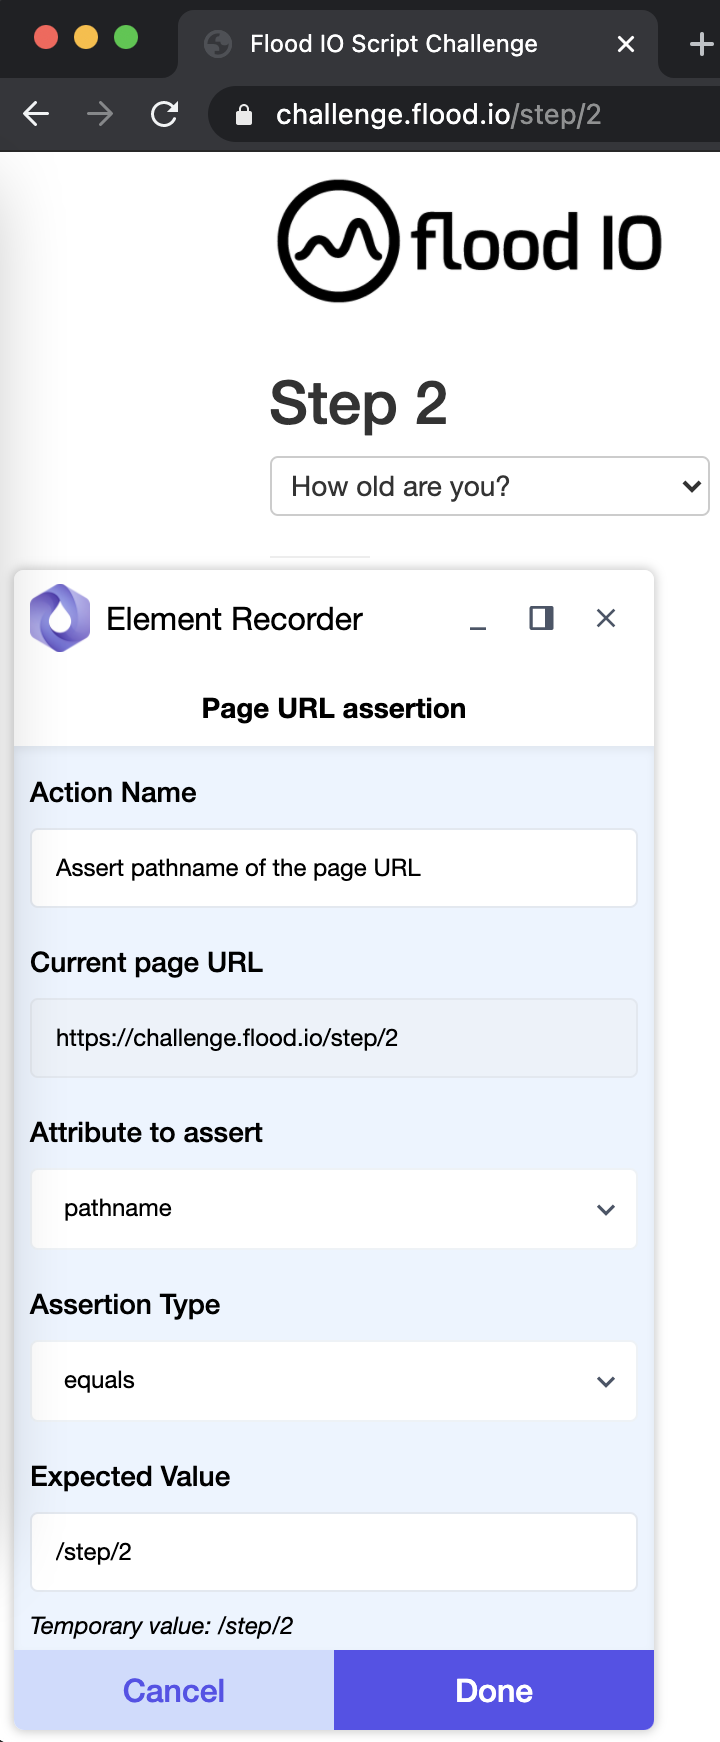
Action name
- Auto-generated based on the Atribute to assert and will be automatically re-generated if this field gets updated.
- You can manually update the action name, but it won't be automatically re-generated in the future.
Current page URL
Pre-populated with the current page's URL whose attribute is used in the assertion (not editable).
Attribute to assert
Allows you to select an attribute of the page URL to assert.
pathnameis selected by default.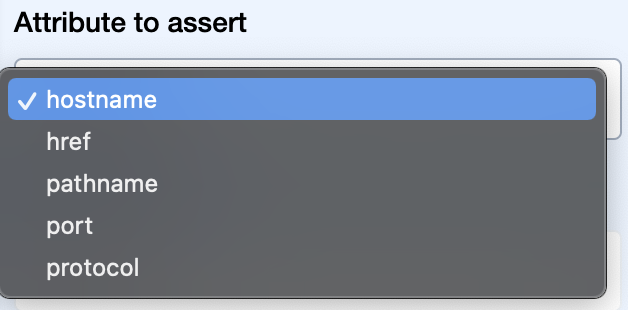
Assertion type
Same as "Assertion type" in Element assertion.
Expected value
Same as "Expected value" in Element assertion.
Cookie assertion#
After selecting to assert Cookie, you will see "Cookie assertion" screen where you can edit the assertion details.
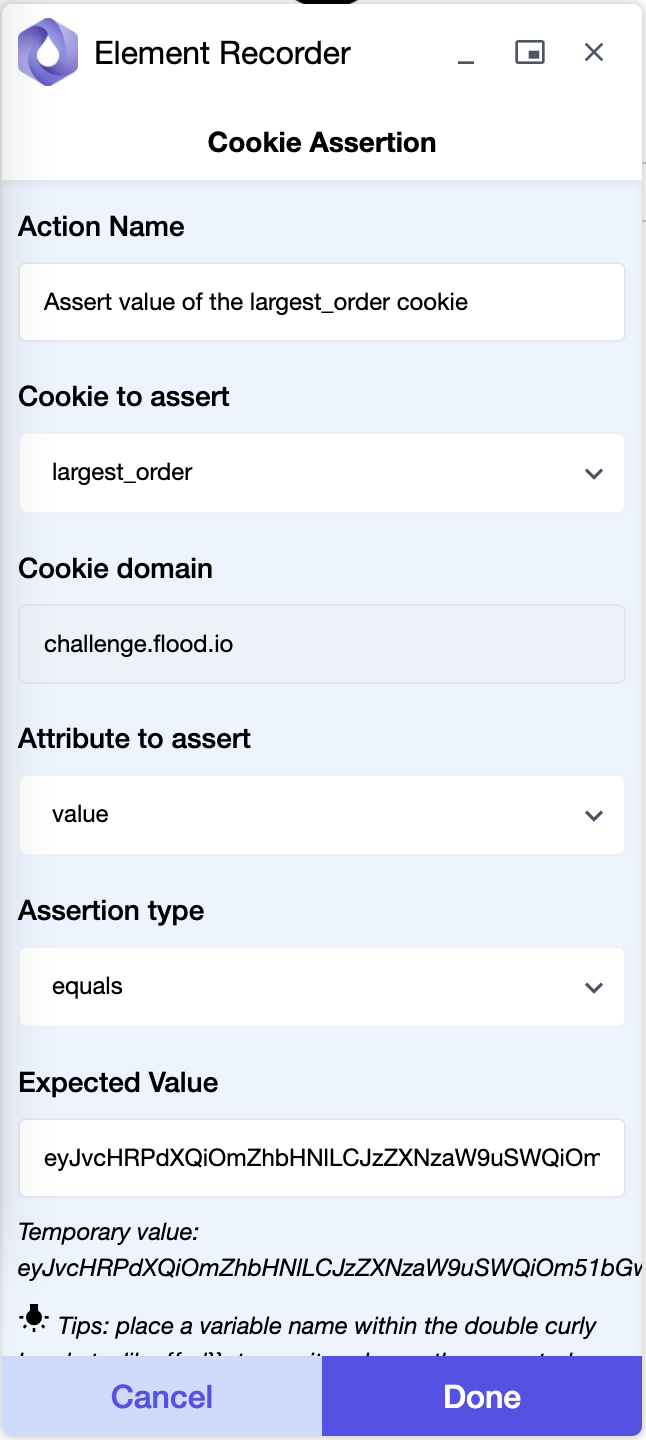
Action name
- Auto-generated based on the Cookie to assert and will be automatically re-generated if this field gets updated.
- You can manually update the action name, but it won't be automatically re-generated in the future.
Cookie to assert
Allows you to select a cookie available on the current page to assert.
Cookie domain
Displays the domain in which this cookie is applicable (not editable).
Attribute to assert
Allows you to select an attribute of the selected cookie to assert.
valueis selected by default.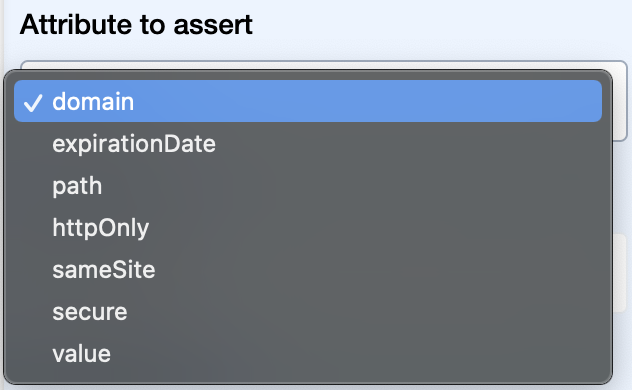
Assertion type
Same as "Assertion type" in Element assertion.
Expected value
Same as "Expected value" in Element assertion.
Edit an assertion#
To edit an assertion, hover on the ASSERT action, then click ... icon > Edit assertion.
Delete an assertion#
To delete an assertion, hover on the ASSERT action, then click x icon.
